Layout Design Tips
Layout design separates thriving model railroads from abandoned plywood. Time spent planning pays dividends for years; time saved by skipping planning costs months in frustrating rebuilds. Whether you’re sketching your first 4×8 or envisioning a basement empire, these principles apply. This guide covers the design fundamentals that working layouts share.
Start with Your Goals
Before drawing any track, answer fundamental questions about what you want from your railroad.
Operations or Watching?
Some modelers want to run trains—making up trains, switching industries, following schedules. Others prefer watching trains flow through scenery. Both are valid. But the optimal layout for operations differs significantly from the optimal layout for viewing. Know which experience you want.
Era and Prototype
Will you model a specific railroad and time period? A freelanced version inspired by prototypes? An entirely imaginary line? Prototype modeling constrains choices but provides research direction. Freelancing offers flexibility but requires self-discipline to maintain coherence.
Space and Budget Reality
Measure your available space precisely. Account for access—you need to reach every part of your layout. Consider future possibility: might you move or gain space? Budget honestly. Grand plans with empty wallets produce frustration.
Understanding scale requirements helps here. Our HO Scale vs N Scale comparison explains how scale choice affects space needs.
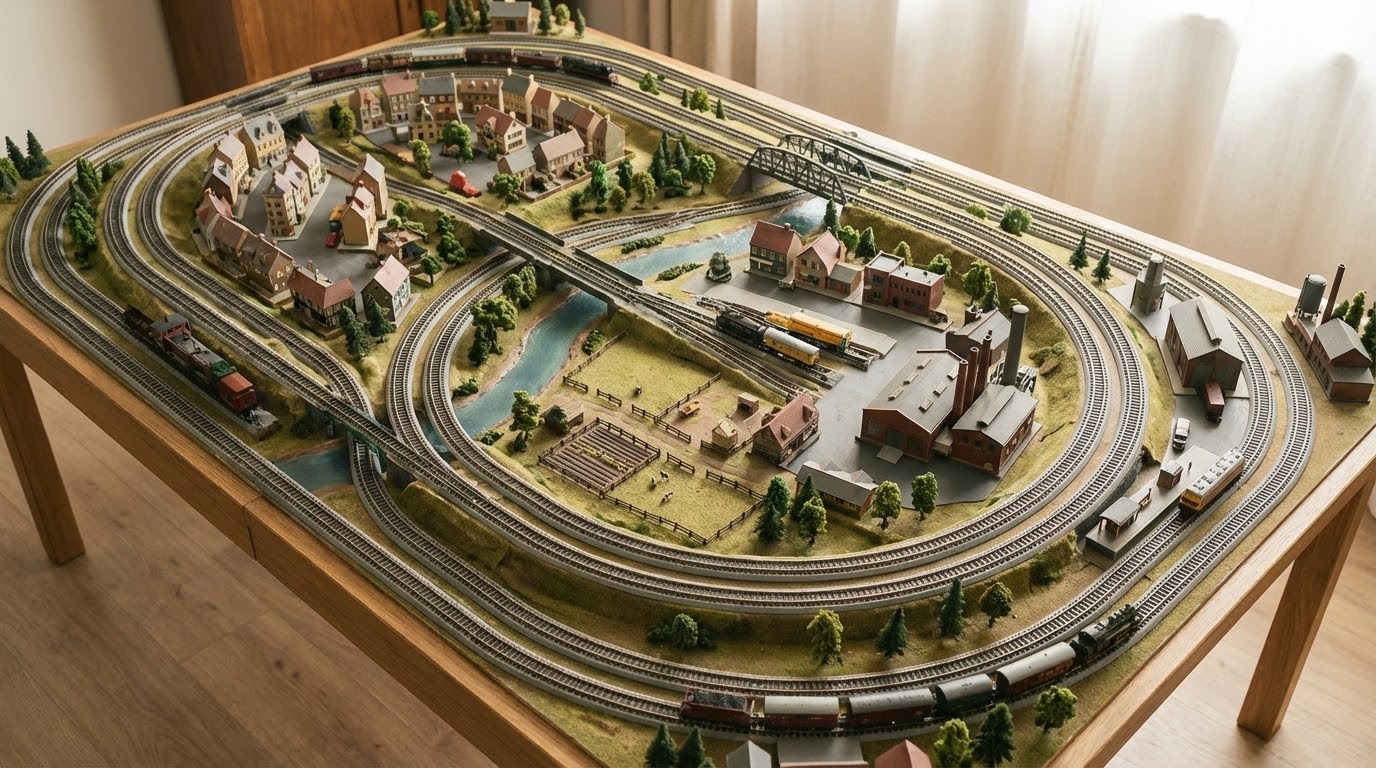
Layout Configuration Types
Layouts fall into several basic configurations. Understanding these helps you choose what fits your space and goals.
The Continuous Loop
Trains can run without attention on a continuous loop. An oval or figure-eight lets you sit back and watch. Add passing sidings and industries for basic operations while maintaining continuous capability. The classic 4×8 plywood layout is typically a simple loop.
Pros: Relaxing viewing, trains run themselves, good for children and casual running.
Cons: Limited operational interest, can feel like toy trains rather than a railroad.
Point-to-Point
Point-to-point layouts have distinct endpoints. Trains run from one location to another, then return. This mimics real railroad operations where trains have destinations. A branch line from a junction to a terminus is a classic point-to-point design.
Pros: Prototypical operations, purposeful train movements, efficient use of space.
Cons: Trains don’t run continuously, requires more operator attention.
Loop-to-Loop
Combine advantages by adding reversing loops at each end of a point-to-point. Trains can run continuously or operate point-to-point. This configuration requires additional space for the loops but offers maximum flexibility.
Switching Layout
A switching layout focuses entirely on operations—assembling trains, spotting cars at industries, and solving switching puzzles. The Timesaver and Inglenook designs fit in minimal space while providing engaging operation. No continuous running, but maximum challenge per square foot.
Around-the-Room
Shelf-style layouts along walls maximize floor space. Trains run around the room’s perimeter on narrow shelves (12-24 inches). A duck-under or lift-out section provides access. This configuration fits significant railroad into rooms that can’t accommodate a central table.
Track Planning Principles
Good track plans share common characteristics regardless of scale or configuration.
Minimum Radius Curves
Every scale has minimum curve radii that equipment can navigate. But “can navigate” isn’t “looks good navigating.” Larger radius curves look more realistic and cause fewer operational problems.
For HO scale: 18-inch radius is the typical minimum; 22-inch looks noticeably better; 24-inch or larger approaches realistic appearance. For N scale: 9.75-inch minimum; 11-inch better; 15-inch or larger for modern wide-body equipment.
Use the largest radius your space allows, especially for mainlines. Tight curves belong in hidden areas or industrial spurs where slow speeds justify them.
Grades
Real railroads avoid grades whenever possible. Mountains forced builders into grades rarely exceeding 2-3%. Model railroads can tolerate steeper grades, but problems increase proportionally.
A 2% grade means 2 inches of rise per 100 inches of track. Most equipment handles 2% without issues. At 3%, longer trains may struggle. Above 4%, operational problems multiply—stalling, coupler failures, runaway cars.
Keep grades consistent. Sudden steepening causes jerky operation and uncoupling. Transition gradually from level to grade and back.
Vertical Separation
Bridges and tunnels require vertical clearance. In HO, allow at least 3 inches from railhead to ceiling/underside. Better: 3.5-4 inches for comfortable operation and scenery. In N scale, 2 inches minimum; 2.5 inches preferred.
Calculate grade length needed to achieve separation. A 3-inch rise at 2% grade requires 150 inches (12.5 feet) of track. Steep grades create space-saving illusions but operational frustration.
Turnout Placement
Turnouts (switches) are track plan fundamentals. Place them thoughtfully:
- Keep turnouts on level track when possible—grades complicate uncoupling and switching.
- Avoid S-curves through turnouts; they cause derailments.
- Ensure adequate straight track between turnouts for locomotive length.
- Position turnouts for realistic switching movements, not just track connectivity.
Designing for Operations
If operations interest you, design principles differ from pure viewing layouts.
Industries That Generate Traffic
Real railroads exist to move freight. Industries are why trains run. Design industries that receive and ship different car types. A team track handles varied less-than-carload shipments. A grain elevator needs covered hoppers. A fuel dealer needs tank cars. An auto dealer needs auto racks.
Diversity matters. Five industries requiring five different car types generate more interesting switching than ten industries all needing boxcars.
Staging
Staging represents the rest of the world—places your railroad connects to but doesn’t model. Hidden staging tracks store trains “offstage” before they enter the visible layout. Good staging provides:
- Realistic train origins and destinations
- Storage for equipment not currently running
- Variety in train composition without visible train-making
Accessible staging beats hidden staging every time. Equipment derails and needs attention. Place staging where you can reach it.
Running Time
Longer main lines provide more running time between work. A train that zips from one yard to another in 30 seconds offers limited satisfaction. A five-minute main line run creates journey sense. Helixes and hidden trackage extend running time when surface space is limited.
Crew Positions
If friends operate with you, design operator positions. Each position should have meaningful work—running trains, switching industries, managing a yard. Avoid designs where one person does everything while others watch.
Benchwork Considerations
How you build your layout’s foundation affects what you can design.
Table-Top Construction
Simple and accessible. A sheet of plywood on legs gets you running fast. Everything happens at one level. Works for beginners and simple designs. Limits scenery below track level and restricts track plan creativity.
Open Grid
L-girder or open-grid benchwork supports irregular shapes, varied elevations, and scenery drops. More complex to build but far more flexible. Allows access underneath for wiring and maintenance.
Foam-Based Construction
Extruded foam (XPS) on simple frames has become popular. Lightweight, easy to cut and shape, naturally quiet. Allows multi-level design without heavy framing. Vulnerable to some solvents and requires compatible adhesives.
Height Matters
Layout height affects viewing and access. Forty to forty-eight inches puts the track at comfortable viewing height for standing adults. Lower heights suit seated operation or children. Higher layouts (fifty-plus inches) create dramatic eye-level vistas but complicate access.
Common Design Mistakes
Learning from others’ errors saves time and money.
Building Too Big Too Fast
The number-one mistake. Ambitious plans, inadequate time, incomplete execution. Giant layouts take years to finish; many never do. Start smaller than you think you should. Complete that section before expanding. Running trains on a finished small layout beats crawling around unfinished plywood.
Ignoring Access
You must reach every part of your layout. Maximum reach from an edge is about 30 inches; 24 inches is more comfortable. If your layout is wider, you need access hatches, lift-outs, or walk-around design. The beautiful scene you can’t reach becomes the scene you can’t maintain.
Cramming Too Much Track
Track-heavy designs look busy and toy-like. Real railroads have vast open spaces between lines. Model railroads need scenery breaks, scenic dividers, and visual breathing room. The layout that impresses visitors usually has less track than you’d expect.
Forgetting Maintenance Access
Wiring fails. Equipment derails in hidden trackage. Turnout machines need adjustment. Design access into your layout. Removable scenery panels, access hatches in hidden areas, and accessible staging prevent frustrating troubleshooting sessions.
Planning Without Building
Analysis paralysis is real. Some modelers plan for years without laying track. Planning is essential, but perfection is impossible. Accept that your first plan has flaws and start building. Experience teaches what planning cannot.
Track Planning Resources
Software and books accelerate the planning process.
Track Planning Software
Programs like SCARM (free), AnyRail, XTrackCAD, and RailModeller let you design digitally. You can test fit track plans in your space, calculate grades, and visualize before building. Most offer libraries of commercial track pieces for accurate planning.
Classic Books
John Armstrong’s “Track Planning for Realistic Operation” remains the bible. Tony Koester’s “Realistic Model Railroad Design” emphasizes prototype inspiration. Kalmbach’s Model Railroader Cyclopedia series provides track plan examples. These books repay their cost many times over.
Published Track Plans
Model Railroader magazine publishes track plans monthly. Online forums share member designs. Don’t reinvent solutions—learn from designs that worked (and those that didn’t). Adapt published plans to your space rather than starting from zero.
The Design Process
A structured approach improves results.
Step 1: Define Requirements
Write down what you want. Era, railroad, operations style, must-have industries, train types, number of operators. Be specific. “A cool layout” isn’t a requirement; “mainline running plus switching at a lumber mill and team track” is.
Step 2: Survey Space
Measure precisely. Note doors, windows, electrical outlets, HVAC vents. Mark obstacles and access points. Create a scale drawing or digital model of your room.
Step 3: Sketch Concepts
Paper sketches cost nothing. Try multiple configurations. Explore around-the-room, peninsula, and island designs. Don’t commit to the first idea; generate alternatives.
Step 4: Refine in Software
Move your best concepts into track planning software. Test for minimum radius compliance, grade calculations, and turnout placement. Identify problems before buying materials.
Step 5: Build a Mockup
Before permanent construction, mock up critical elements. Use cardboard boxes to represent benchwork. Walk around your mock layout. Check sightlines and access. This step catches problems that drawings miss.
Step 6: Build in Phases
Divide your layout into completable sections. Build one section fully—benchwork, track, wiring, basic scenery—before starting the next. Running trains on completed sections maintains motivation.
For inspiration on bringing your layout to life after track is laid, see our guide to Realistic Scenery Techniques.
Frequently Asked Questions
How do I know what size layout to build? +
Build smaller than you think you should—seriously. Measure your available space, then design a layout that uses 60-70% of that maximum. The remaining space provides access, tool storage, and future expansion. A 4×8 sheet is a reasonable starter in HO; a 2×4 works for N scale beginners. Complete a small layout before expanding. The satisfaction of running trains on a finished section beats the frustration of an incomplete empire.What’s the best track plan for beginners? +
A simple oval with one or two passing sidings and an industrial spur teaches fundamental skills without overwhelming. You learn track laying, wiring, and basic operation. Once running, add complexity incrementally. Avoid elaborate plans with dozens of turnouts, hidden staging, and multiple levels for your first layout. Save ambitious designs for your second or third effort when experience informs planning.Should I use code 100 or code 83 track in HO? +
Code 83 track looks more realistic—the rail height better represents prototype proportions. Modern equipment runs fine on code 83. However, some older equipment with deep flanges derails on code 83. Code 100 works with virtually everything and costs slightly less. For visible mainline trackage, code 83 is worth the investment. For hidden trackage and beginners prioritizing reliability, code 100 remains practical.How steep can my grades be? +
Keep mainline grades at 2% or less for reliable operation with standard-length trains. Industrial spurs and branch lines can tolerate 3% with shorter cuts of cars. Above 3%, operational problems increase—stalling, uncoupling, and runaway cars. Helpers (additional locomotives mid-train or pushing) allow steeper grades on model railroads just as on prototypes. Remember: a 2% grade requires 50 inches of track per inch of rise.How much scenery space should I leave between tracks? +
More than you think. Parallel mainlines look realistic with 4-6 scale feet between tracks (about 0.5-0.7 inches in HO). But scenes between track runs need substantial separation—ideally 12+ inches in HO—to create visual breaks. Use scenery dividers (ridges, buildings, trees) to break sightlines. A layout with generous scenery space between tracks looks larger and more realistic than one crammed with parallel lines.
Design Is an Ongoing Process
Your layout will evolve. Modelers constantly tweak, improve, and sometimes tear out sections that don’t work. This is normal. Design provides direction, not a straitjacket.
The best layouts result from informed planning followed by willingness to adapt. Build what you planned, operate it, discover what works and what frustrates, then refine. Each iteration improves the railroad.
Don’t let the pursuit of the perfect plan prevent you from building an imperfect layout. Every legendary layout started as flawed track on uncertain benchwork. The modelers who built them learned by doing, and you will too.
Affiliate Disclosure: Off The Rails participates in affiliate programs. Links to products may earn us a commission at no extra cost to you. We only recommend products we genuinely believe benefit the hobby.