Getting Started with Model Railroading
Model railroading remains one of the most rewarding hobbies in North America. Whether you grew up watching freight trains rumble through your hometown or spent hours at a local hobby shop pressing your nose against the glass, there’s something magnetic about miniature locomotives. This guide will walk you through everything you need to know to start your first layout—without overwhelming your budget or your basement.
Why Model Railroading Captures So Many Hearts
The appeal of model railroading runs deep. It combines engineering, artistry, history, and craftsmanship into a single pursuit. You might be drawn to recreating the steam-powered glory days of the Pennsylvania Railroad or modeling modern-day BNSF intermodal trains crossing the Midwest. Either way, the hobby offers something rare: a creative outlet with no ceiling.
Unlike many hobbies, model railroading scales with your interest. You can spend a weekend building a simple loop on a door-sized board, or devote years to constructing an entire basement empire complete with automated signals, realistic scenery, and hundreds of cars.
Choosing Your First Scale
Scale refers to the ratio between your model and the real thing. The scale you choose affects everything—space requirements, cost, detail level, and available products. For most beginners in North America, two scales dominate the conversation.
HO Scale (1:87)
HO scale strikes a balance that works for most hobbyists. The trains are large enough to see fine details and handle easily, yet small enough to fit a meaningful layout in a spare room. Product availability is unmatched—virtually every North American prototype has been produced in HO, from Union Pacific Big Boys to modern CSX diesels.
A typical HO locomotive measures about 6-8 inches long. Track curves comfortably in an 18-inch radius, meaning you can build a continuous loop on a 4×8 sheet of plywood with room for scenery.
N Scale (1:160)
N scale offers roughly half the size of HO, which translates to quadruple the layout in the same space. If your modeling area is limited to a closet, apartment corner, or small desk, N scale lets you run longer trains through more realistic scenery.
The tradeoff? Smaller components require steadier hands and better eyesight. Detail work becomes more challenging, and some maintenance tasks need specialized tools. That said, modern N scale equipment has improved dramatically—today’s locomotives rival HO for smooth operation and reliability.
For a deeper dive into scale selection, check out our complete guide to HO Scale vs N Scale.
Essential Tools and Supplies for Beginners
You don’t need a workshop full of equipment to start. The following tools will handle 90% of beginner projects:
- Track cleaning supplies – Dirty track causes most running problems. A bright boy abrasive block and isopropyl alcohol work wonders.
- Precision screwdrivers – Jeweler’s sets with Phillips and flathead tips handle most locomotive and car adjustments.
- Needle-nose pliers – Essential for track work and coupler adjustments.
- Rail joiners and track nails – Keep spares on hand; you’ll use them constantly.
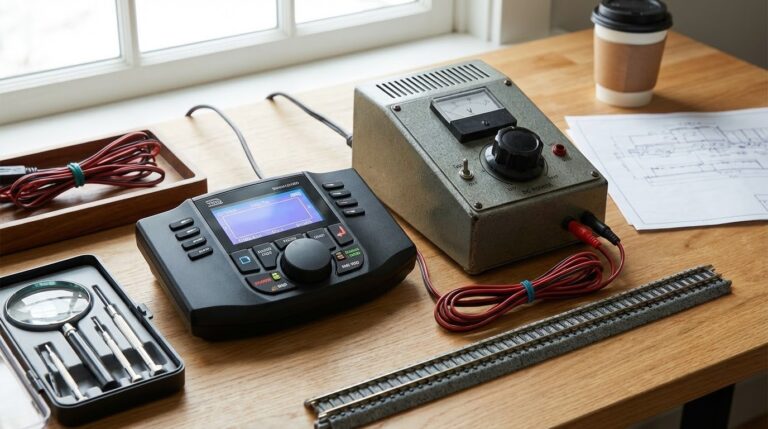
- A reliable power pack – Even if you plan to upgrade to DCC later, a basic DC power pack gets you running immediately.
- Foam roadbed – Woodland Scenics and others make pre-cut foam that quiets operation and looks better than bare plywood.
DC vs DCC: Understanding Power Options
Your layout needs electricity to run, and two systems compete for your attention.
DC (Direct Current)
Traditional DC control has powered model railroads for decades. A power pack sends variable voltage to the track; more voltage means faster trains. It’s straightforward, affordable, and perfect for simple layouts where you run one train at a time.
DCC (Digital Command Control)
DCC revolutionized the hobby by embedding a decoder chip in each locomotive. The track carries constant power plus digital signals. Each locomotive responds only to its unique address, letting you run multiple trains independently on the same track. Sound effects, lighting control, and programming options make DCC incredibly versatile.
We’ve written an in-depth breakdown in our DCC vs DC comparison guide—essential reading before you buy your first power system.
Planning Your First Layout
Layout planning separates frustrating projects from satisfying ones. Before cutting any wood or laying any track, spend time with paper and pencil.
Consider Your Available Space
Measure your room carefully. A classic 4×8 table fits through most doorways and provides enough space for an oval with sidings. If space is tight, consider a shelf layout along walls—sometimes called a “around the room” design—or a smaller switching layout focused on operations rather than continuous running.
Think About Operations
Do you want to watch trains run in circles, or do you crave realistic switching movements? Point-to-point layouts simulate real railroad operations where trains have destinations. Continuous loops offer relaxing viewing. Many layouts combine both—a main loop with industrial spurs for switching.
Start Simple, Expand Later
The most common beginner mistake? Overambition. Grand plans lead to unfinished layouts. Instead, build a small, complete section first. Run trains. Learn what works. Then expand based on experience.
Our Layout Design Tips article covers planning strategies in detail, including track geometry, grade considerations, and benchwork options.
Building Your Benchwork
Benchwork refers to the structural foundation supporting your layout. Options range from simple to elaborate.
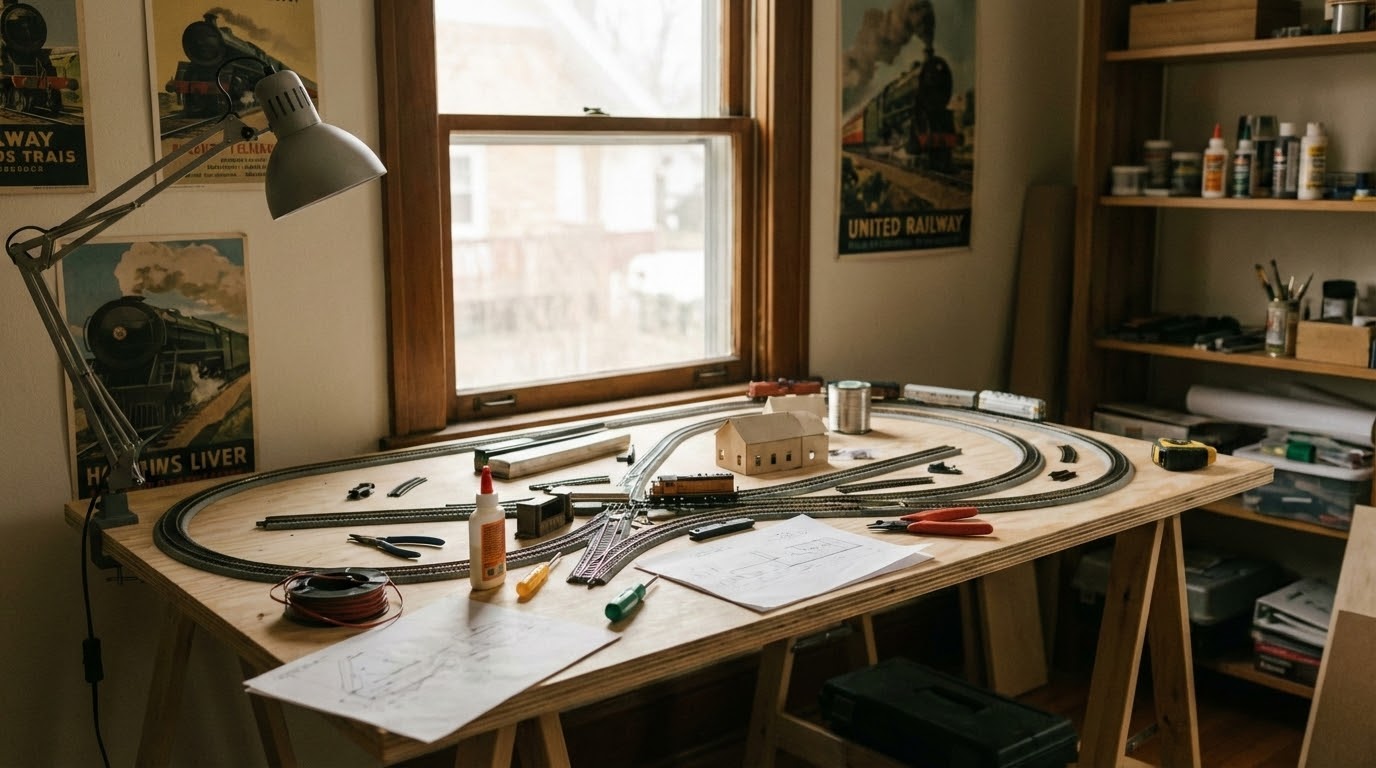
The Classic 4×8 Sheet
A single sheet of half-inch plywood on folding legs gets you running fast. It’s cheap, portable, and requires minimal tools. The downside? Plywood flexes, and the rectangular shape limits creative track plans.
Open Grid Construction
More advanced builders construct open grid frameworks from 1×4 lumber. This method supports irregularly shaped layouts, allows scenery to drop below track level, and provides better access underneath for wiring. It requires more planning but produces professional results.
Foam-Based Construction
Extruded foam insulation boards (like those from Owens Corning or Dow) have gained popularity. They’re lightweight, easy to shape with simple tools, and naturally quiet. Many modelers now use foam exclusively, supporting it on simple wooden frames.
Laying Your First Track
Track laying seems intimidating but follows logical steps.
- Prepare the surface – Sand any rough spots. If using foam roadbed, glue it down first and let it cure overnight.
- Test fit your track plan – Lay out all track pieces without fastening. Ensure everything connects smoothly.
- Start from a reference point – Usually a turnout (switch) or major junction. Work outward from there.
- Secure track gradually – Use track nails or small screws through foam. Don’t overtighten—track needs slight room to expand.
- Connect feeder wires – Solder wires every three feet or so for reliable power distribution.
- Test frequently – Run a locomotive over each section before moving on. Catching problems early saves headaches.
Your First Locomotive and Rolling Stock
With track in place, you need something to run. Resist the urge to buy everything at once. A starter set often provides the best value—typically including a locomotive, several cars, track, and power pack.
Starter Set Recommendations
Bachmann, Kato, and Athearn all produce quality starter sets for North American modeling. Look for sets featuring:
- A diesel locomotive (more reliable than steam for beginners)
- Four to six freight cars
- An oval of track with one or two turnouts
- A basic power pack or DCC controller
Budget around $150-300 for a quality starter set. Cheaper options exist but often frustrate with poor performance.
Adding Scenery and Structures
Bare track on bare plywood doesn’t inspire. Scenery transforms your layout from a toy into a miniature world.
Start with ground cover. Woodland Scenics and other manufacturers sell various turf colors representing grass, dirt, and gravel. Apply white glue diluted with water, sprinkle ground foam, and let dry. The transformation is immediate.
Trees, bushes, and rocks add dimension. Ready-made trees cost more but save time. Scratch-building from wire, foam, and ground cover costs less but requires patience.
Structures anchor your scenes. Start with kits—laser-cut wood or injection-molded plastic kits teach basic techniques. Eventually, you’ll kitbash (combine parts from multiple kits) or scratchbuild entirely custom buildings.
For comprehensive techniques, our guide to Realistic Scenery Techniques covers everything from ballasting track to weathering structures.
Budget Considerations for Beginners
Model railroading accommodates any budget, but costs add up quickly without planning.
Entry-Level Budget ($200-400)
A starter set plus basic scenery materials gets you running. Focus on completing a small layout rather than accumulating equipment.
Intermediate Budget ($500-1,000)
Room for quality locomotives, expanded track, a DCC system, and proper benchwork. This range produces satisfying layouts that run well and look good.
The Long Game
Most hobbyists spread purchases over years. A $2,000 layout built over five years costs just $400 annually—less than many hobbies. Patience rewards both your wallet and your layout.
Joining the Model Railroading Community
The hobby thrives on community. Local clubs offer operating sessions, shared knowledge, and inspiration. The National Model Railroad Association (NMRA) provides standards, conventions, and regional divisions across North America.
Online forums and YouTube channels have exploded with content. Channels dedicated to realistic weathering, DCC programming, and layout tours offer free education that would have cost hobbyists years of trial and error just two decades ago.
Common Beginner Mistakes to Avoid
Learning from others’ errors saves time and money:
- Building too big too fast – Small, complete layouts teach more than giant unfinished ones.
- Ignoring track cleaning – Dirty track causes 80% of running problems.
- Skipping planning – Hours of planning save days of rebuilding.
- Buying cheap equipment – Entry-level doesn’t mean lowest price. Poor locomotives frustrate and discourage.
- Isolating yourself – Join a club or online community. The hobby is better shared.
Frequently Asked Questions
How much space do I need for a model railroad? +
You can build a satisfying layout in surprisingly small spaces. A 4×8 foot table accommodates a classic HO scale beginner layout. N scale fits meaningful layouts on a 2×4 surface or even a bookshelf. Shelf layouts around room walls maximize space. Even a 2×3 foot switching layout provides hours of operation. The key is matching your scale and design to available space rather than forcing an oversized plan into a small room.What’s the best scale for beginners? +
HO scale (1:87) remains the most popular choice for beginners in North America. It offers the best balance of size, detail, product availability, and price. N scale (1:160) works well if space is limited. O scale (1:48) suits those with larger spaces who want maximum detail. Z scale (1:220) exists for extreme space constraints but requires excellent eyesight. Most hobby shops, train shows, and clubs focus on HO, making it easiest to find help and supplies.Should I start with DC or DCC? +
For absolute beginners with simple layouts, DC power offers lower entry cost and simpler operation. However, if you plan to expand your layout or run multiple trains, starting with DCC saves money long-term by avoiding conversion costs later. DCC systems have become affordable, with entry-level systems around $100-150. Most serious modelers eventually switch to DCC for its operational flexibility and sound capabilities.How much does it cost to start model railroading? +
A basic starter set with locomotive, cars, track, and power pack runs $150-300. Add $50-100 for basic tools and scenery materials, and you can build a simple running layout for under $400. Quality improves with budget—a $600-800 investment yields noticeably better performance and appearance. Remember that model railroading is a long-term hobby; most layouts develop over years of gradual investment rather than single large purchases.Where can I find help and learn more? +
Local hobby shops offer hands-on advice and often host clinics. Model railroad clubs welcome beginners and provide access to layouts for learning. The National Model Railroad Association (NMRA) has regional divisions with meetings and conventions. Online resources include dedicated forums, Facebook groups, and YouTube channels covering every aspect of the hobby. Model Railroader and Railroad Model Craftsman magazines provide monthly inspiration and tutorials.
Taking the First Step
The longest journey begins with a single step—or in this case, a single rail. Don’t wait for perfect conditions or complete knowledge. Buy a starter set, clear some space, and lay your first track. The learning happens by doing, and the community stands ready to help when you hit obstacles.
Model railroading has survived over a century because it offers something rare: a hobby that grows with you. What begins as a simple oval on plywood can evolve into a lifetime pursuit spanning engineering, art, history, and craftsmanship. The trains are waiting. It’s time to get started.
Affiliate Disclosure: Off The Rails participates in affiliate programs. Links to products may earn us a commission at no extra cost to you. We only recommend products we genuinely believe benefit the hobby.